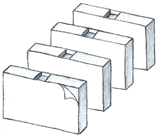
Lay Quads
This guide relates to the Lay Quads available in our shop.
These are no more complicated than 30 point mid spaces, with double-sided adhesive applied to both sides.
To use, follow a procedure as follows, or something along these lines to fit with your usual sequence of make-ready steps. What follows is how we do it in the Happy Dragons’ Press machine room.
Carbon Paper Proof
Starting with no ink on the press, or at least having removed the inking rollers and laid them carefully aside, put the forme in the machine and take a proof with fresh pencil carbon paper. Mind your fingers!
This produces a more or less faint image on the ‘top sheet’ of the packing, or ‘overlay’, call it what you will. (If you're using our Top Layer Packing, use a piece of paper over the top.)
Position Mark-Up Sheet
Now take a sheet of the actual job paper and, working on a bench, rule lines on that with a pencil to show where the image is to fall (not forgetting any eventual finishing trims, if any) extending those lines right to the edge of the sheet. Call this the ‘Position Mark-Up sheet’
Rule those same lines onto that faint carbon paper image on the top sheet of the packing, again extending them right and left well outside where the edges of the job paper will fall.
The Critical Bit
Using very short bits of masking tape fix the ‘Position Mark Up Sheet’ with its pencil lines on top of and exactly in register with those same lines on the top sheet of the packing. This is the critical part of the job, and must be dead right. Its not at all easy to move ‘Lay Quads’, if needful, best replaced entirely with new ones. If the forme has to be tinkered with at a later stage, you may need to start the whole process again from the beginning. Motto: get the proofing stage entirely finalised and completed first, avoid dithery customers!
Using the Lay Quads
Take two of the ‘Lay Quads’, remove the release paper from one side only for the time being and bring one each side up to touch the lower edge, (ie the edge furthest down the platen) of the job paper - which is now in the correct position and press firmly down.
These two need to be set about a quarter of the length of the sheet, or thereabouts, in from either side.
A third ‘Lay Quad’ should now be placed whichever side suits you for feeding across to, for many folk and many jobs this will be the right hand side as you look down the platen throat.
Proofing on the Job Paper
Next we usually take another pull with carbon paper, on the actual job paper, this still being in the correct final position (this sheet will need to be retained with small bits of masking tape). Once the press is open again, one can cut small (or large) bits of card, to act as retainers or ‘forme strippers’ to prevent the sheet falling down the throat just before impression, and also to peel the printed sheet away, ready for delivery.
On some jobs these may even need to be be a substantial frisket, with only a few holes to let the type impress through. These card ‘strippers’ are easily mounted on the previously fixed ‘Lay Quads’, by removing the ‘Lay Quad’ top side release paper, and pressing the card on, taking very great care with positioning to avoid contact with the type of the forme.Card ‘strippers’ will need very slightly curled up outer edges, to make feeding easier. The diagram, right, shows the gentle curl of the card away from the packing. You can curl card in the same way as curling ribbon; by running one side against the open blade of a pair of scissors, a thumb nail, or even a steel rule.
Larger friskets or larger sheets will need more ‘Lay Quads’, for happy feeding.
Lastly...
Remove that carbon paper printed position sheet, and all the bits of masking tape. You can now start getting the ink level right.
Our ‘Lay Quads’ will be found much better to lay to than the once popular ‘McGills’ lay pins made from bent wire. For one thing ours don't move!
You Might Also Like...
- Swiss Style Packing £2.00
- Spacing from £3.00
- NEW: 'Other Voices of the British Isles' £16.00
- Find a Letterpress Museum Near You
