
Illustrations
Illustrations are printed in the same way as type, so a printable raised and mirrored image needs to be produced. Sometimes an artist will cut or engrave the image themselves, as with these techniques:
- Wood-cuts are simply a piece of wood with a carving on the survace.
- Wood engravings are made from harder wood and are marked with small, sharp tools for a highly detailed image.
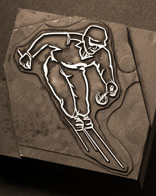
- Lino-cuts are the most common form of illustration, made by cutting into the surface of lino. Lino-cuts are usually quicker and easier to produce than wood-cuts or engravings. Sometimes a more modern material is substituted for lino, but the end result is very similar.
 To reproduce existing images (like line drawings) a specialist block maker is usually employed. Working from the original artwork, they use a photographic process to produce plastic or metal blocks.
- Nylon blocks, also known as nyloes or photopolymer blocks, are etched with light-sensitive chemicals.
- Photographs are hard to reproduce well with letterpress technology, even if they're just black and white. Block makers can make metal halftone blocks which have tiny dots of different sizes to make lighter and darker areas.
To print nicely, the image needs to be type high – the same height as type. Wood-cuts and wood engravings are usually worked on wood that has been cut to exactly the right height already, but nylon/photopolymer and lino-cuts need to be mounted on a piece of wood to bring them up to type height (which is .918 of an inch).
If the illustration is going to be the same colour as the text then it can be printed together with the type but, usually, it will be printed separately. If there is more than one colour in an illustration, each will be printed separately, with a different block for each colour. Skill is required to get these in register (lined up nicely!).
In this example, three separate lino-cuts have been created:
The first colour (shown here in blue) is printed and left to dry. The second colour (shown in green) is printed on the same piece of paper, carefully lined up with the first. Once that's dry the black is added, with the other colours peeping through.
You Might Also Like...
- Where Can I Find... Lino & Woodcutting Supplies
- Getting Started: Block Mounting
- Lino Cutting Tips
- NEW: 'Other Voices of the British Isles' £16.00
- Find a Letterpress Museum Near You
- Links to Other Presses